Step 1: Dopping the Rough

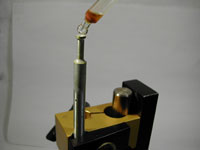
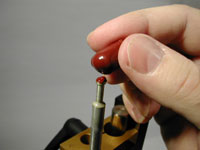
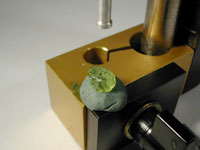
The first step is to prepare the dop stick for wax. Select a dop that will be slightly smaller than the completed stone. Clean the dop thoroughly, then apply a drop or two of "wax solution" to ensure good adhesion. For the wax solution, I use an empty medicine bottle (with eye-dropper) filled with alcohol and containing dissolved chunks of spare / excess dop wax.

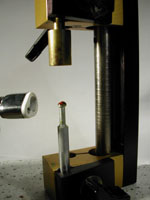
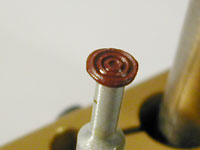
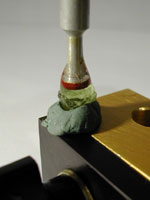
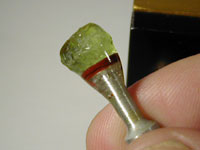
Let the solution dry completely - it should leave a faint brown patina on the dop stick.

When the solution has dried, melt a drop of wax onto the tip of the dop stick. I prefer the brown "diamond setters" wax, which has a slightly higher melting temperature than others.

Try to make a small bead or lens of wax on the tip of the dop, without overflowing down the shaft of the dop

Place the dop one one side of your transfer fixture, and select a larger flat dop for the other side. I prefer the 1/2 inch Graves dop, since it has a textured face (see next panel). Although not strictly necessary, I usually place the wax-coated dop facing upward as shown.

Heat the bead of wax until it is melted, but not boiling. Gently bring the larger flat dop into contact with the wax, then withdraw it. The goal is to "freeze" and mold the wax into a flat, textured disk suitable for epoxy bonding. The two dops should never touch, and you should avoid wax overflowing down the dop.

The disk of wax after cooling. Note that the Graves dop has created a textured surface, which increases surface area and hence produces a stronger bond with the epoxy.

If there is some slight overflow or "ears" of wax sticking out, you can clean things up with an Exacto knife or razor blade. I aim for a disk of wax a little less than a millimeter thick.

Now comes the important part. Remove the waxed dop and attach the gem rough to one side of your transfer fixture using putty (the design of your transfer fixture may require some adjustment here - I use a Polymetric jig). Here I am cutting a nice piece of Mali garnet in my Tearbuncle design.

Using another dop for visual guidance, adjust the location of the stone for optimum high yield. Take your time here. Unlike with wax, you have the time to get things right, and you can see where everything is.

When you are completely satisfied with the location of the stone, remove the alignment dop and replace it with the waxed dop prepared earlier. Your are now ready for the epoxy.

As you can see, I use UHU brand five minute epoxy. This is a very high quality product with several minutes work time. It hardens within a couple of hours, creating an extremely durable bond.

Epoxy can be messy, so I use a disposable surface (aluminum foil) and a disposable mixing stick (half of a Q-tip).

Apply a drop of epoxy to the stone, then lower the dop into contact (if you have ground a flat surface onto the gem rough, you will want to leave a small gap of epoxy at this stage). Excess epoxy should squish out the sides.

Apply additional epoxy to create a smooth bond and fillet. I continuously rotate the transfer jig to prevent drips from running over the stone. After a few minutes, the epoxy will have set, and you can set the whole rig aside to harden.

Depending on the brand of epoxy, it may help to place the transfer fixture in a warm place, such as on a radiator. With UHU, this definitely speeds the hardening process and produces a better bond.

Step 1 accomplished!

After a couple of hours, the epoxy should be hard enough to begin faceting the pavilion.

Note the disk of wax between the stone and dop - this will allow easy unbonding during the transfer stage.

Now go cut the pavilion!