Step 2: Transfer After Cutting the Pavilion

The pavilion is now cut and polished. Remove the dop and stone from the faceting machine and admire your work so far.

Clean the pavilion carefully with alcohol and set it aside.

The next step is to create a thin layer of wax in a cone dop to receive the pavilion.

Select a suitable cone dop (or Vee dop if appropriate). Again, make sure that it is somewhat smaller than the final cut stone.

Clean the cone dop with alcohol, and as before, apply a drop of the wax solution to ensure good adhesion of the dop wax. Let the thin layer of wax solution dry completely.

Clamp the new dop facing upward, and melt a small amount of dop wax into the cone. I try to "fill" the cone without having too much sticking above the rim. This wax will form the thin layer between the dop and stone. This will allow easier release later. It also prevents accidental chipping of the pavilion from contact with the metal dop stick.

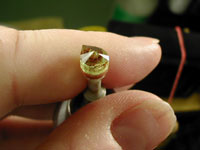
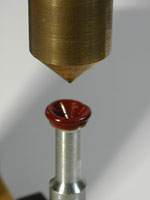
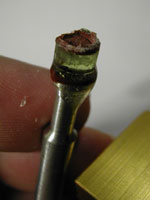
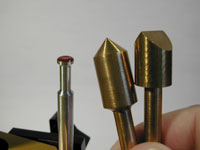
As before, we need something to form the melted wax into the desired shape. I use homemade brass "anti-dops," which are the mirror image of actual cone and Vee dops.

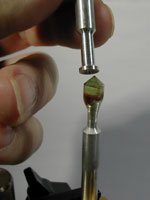
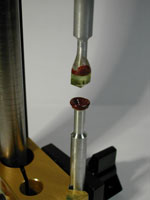
Such accessories are not necessary. You could use the stone itself to make an impression, or even manufacture your own anti-dops on your faceting machine, using inexpensive rough (i.e. glass) permanently attached to a dop stick (essentially like the brass ones at left, but made of dopped-up chunks of glass). Attentive readers will note that a flat dop, such as that used in Step 1, is its own anti-dop.

Again, clamp the cone dop facing upward and place the "anti-dop" in the other half of your transfer fixture. Warm the wax until it is molten, but again take care not to boil it. Bring the two dops together carefully then withdraw the anti-dop. Make sure that you don't squeeze out all the wax.

A cone shape should now be "frozen" and molded into the cone dop (right image).

You are now ready for the epoxy stage. Replace the anti-dop with the dopped gemstone. Gently lower the stone and check for good alignment and fit.

Mix up some five-minute epoxy as before. Place a small drop of epoxy into the wax cone and lower the gemstone until it is well seated and epoxy flows out of the gap.

If you are using the girdle facets for mechanical or optical alignment of the stone after transfer (see here), you should take care that the girdle facets don't get covered with excess epoxy. Having the gemstone on top certainly helps, as does using the right amount of glue.

Form a smooth joint and fillet as before.

Rotating the transfer jig until the epoxy sets can prevent asymmetries and dripping.

When the epoxy has set (a few minutes), set the transfer jig aside to allow it to harden. Again, a warm place may speed things up and improve the bond.

When the epoxy has hardened, you can use a heated Exacto knife to cut through the epoxy and wax disk separating the stone from the old (flat) dop. Please don't cut the wrong bond at this point!

I tend to use the knife to cut through the thin epoxy "skin" around the wax, then warm the middle of the flat dop. By the time that it gets warm to the touch, you should be able to bend and break the wax bond. It never gets hot enough to worry about melting and shifting on the other side of the stone, but for security, you may want to wrap the stone and cone dop in a wet paper towel.

Transfer accomplished! Note that some epoxy and wax have remained on the stone. You may be able to remove this with a fingernail, or just let it fall off during the crown cutting step.

Now back to the machine to cut and polish the crown!